
I've been making these salt dough ornaments on and off for over 30 years. I love' em. They're super easy to make. You can keep it simple and use cookie cutters or go all out elaborate and create freehand ornaments. Salt dough ornaments make great gifts and it's something the kids can do pretty much on their own. And, if you store them properly, they last for years and years and year.
This year, I decided to make personalized Bodacious Holiday Ornaments to raise funds so we can keep our Bodacious Biscuit Love Bin stocked for pet parents in need. We did very well and had a lot of positive feedback after people received their ornaments.
If you're interested in making salt dough ornaments, here's a little step-by-step tutorial to get you started...

In a bowl of mixer add 1 cup of salt, 2 cups of flour, and 3/4 to 1 cup of very warm water. Mix. The dough should be a tiny bit softer than Play-Doh. Too dry? Add a little more water no more than a tablespoon at a time. Too sticky and soft? Add a little more flour a couple tablespoons at a time.

Your dough should look like this. Before rolling, generously flour the surface and sprinkle flour on top of the dough.

Roll. I wouldn't go any thinner than 1/4 of an inch.

Grab your cookie cutter of choice.


Place your ornaments on a cookie sheet leaving about 1/4 inch between ornaments.

Don't forget to push in a small paper clip or bent wire into your ornament prior to baking. This is an important step because you'll need this to tie on your string.

I bake my ornaments at 325 for about an hour. It's important these ornaments are fully baked. For the ornaments I made, it didn't matter if the they browned because I was painting the entire ornament. If you don't want them to brown, bake at a much lower temperature for longer.

Once the ornaments are cooled off, you can paint. Use an acrylic craft paint. Our local Walmart has Apple Barrel Craft Paint by Plaid for less than a $ per container. Michael's also has several brands to choose from and the prices vary from less than $1 to over $2 per container of acrylic craft paint. Be sure to let the paint dry before painting details and/or personalizing.
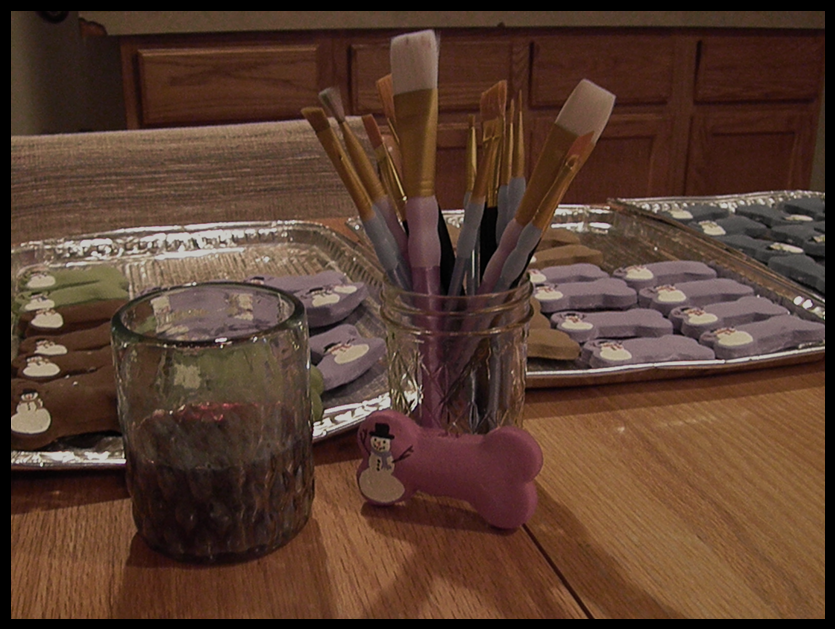
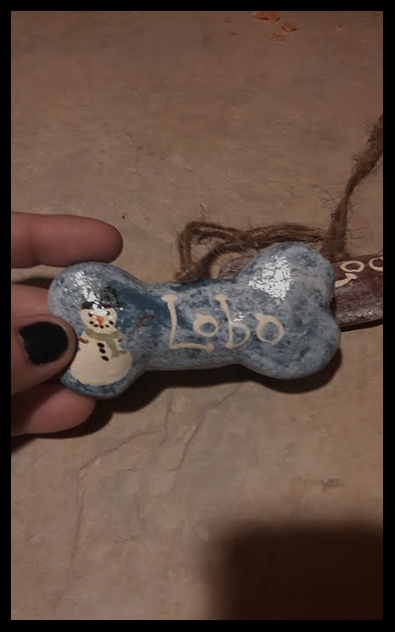
I had a lot of ornaments to paint. I used 2 coats of paint. The next day, I painted snowmen on each ornament. I spent most of the afternoon enjoying my mock version of the Drunken Palette.

In the days ahead, I personalized each ornament. To finish the ornaments, I dated them on the back and used twine to make the tie.

If you're thinking about coating the ornaments with any type of gloss, make sure to do a few sample pieces beforehand. The sample pieces I made a week before offering the ornaments for sale saved me from having a huge disaster on my hands. You can read about that here.
I wasn't joking. Because of the salt content in the dough, most of your paint on glosses are not compatible. Reactions occurred anywhere between 1-4 days after application.
Are you planning on making some salt dough ornaments? We'd love to see photos of your finished product!
No comments:
Post a Comment